Cooking A-Z :: C is for Carmelitas

When I first came across this recipe, I saw that it was titled “aka the best cookies ever,” and I thought, hmm.. that’s a pretty tough title to claim. I mean, the BEST cookies EVER. There are thousands, if not millions, of recipes out there for cookies whether it be a classic chocolate chip or a crazy candy bar cookie bar. And for this recipe to be called THE BEST is a pretty big statement to make. However, after baking and tasting these bars, I think they can be placed pretty high up in the ranks.

IMG_0059I mean wow, look at the delicious, gooey caramel layer topping the decadent layer of chocolate. Wow, it’s as mouthwatering to look at as it is to eat it.  To contrast the ooey-gooey-ness of the caramel and chocolate, we have the buttery top layer of oats and the slightly crunchy crispy bottom layer of oats.

If you have these ingredients in your kitchen, go make these immediately. Drop whatever you’re doing, go into the kitchen, and whip up a batch of these delicious carmelitas.


Ingredients:

32 caramel squares, unwrapped (I used caramel bits instead)
1/2 cup heavy cream
3/4 cup butter, melted
3/4 cup brown sugar, packed
1 cup flour
1 cup rolled oats
1 teaspoon baking soda
6 ounces semisweet chocolate chips

Directions:

1. Combine caramels and cream in a small saucepan over low heat. Stir until completely smooth; set aside.

2. In a separate bowl, combine melted butter, brown sugar, flour, oats, and baking soda.

3. Pat half of the oatmeal mixture into the bottom of an 8×8″ pan.

4. Bake at 350 degrees for 10 minutes.

5. Remove pan from oven and sprinkle chocolate chips over crust.

6. Pour caramel mixture over chocolate chips.

7. Crumble remaining oatmeal mixture over caramel.

8. Return to oven and bake an additional 15-20 minutes, until the edges are lightly browned. Remove from oven and cool completely before cutting.

Original Recipe

Cooking A-Z :: B is for Browned Butter Chocolate Chip Cookies

My first time browning butter was a pretty amazing experience. I managed to brown it without burning it and my oh my, the smell was heavenly. I typically don’t like the smell of butter, but browned butter, well, that’s a whole ‘nother story.

My birthday passed recently, and of course, I made my own birthday cake! I’ll be making a post on that very soon. (psst! it’s an oreo cake)

These really are some AWESOME cookies, so I highly recommend trying these out. The browned butter adds a dimension to the cookies that you can’t get with any other ingredient.

Image

photo courtesy of bellalimento.com

Ingredients:

  • 2 sticks unsalted butter
  • 2 1/4 cups all purpose flour
  • 1 1/4 teaspoon baking soda
  • 1/4 teaspoon kosher salt
  • 1 1/4 cup packed brown sugar
  • 1/4 cup granulated sugar
  • 2 Eggs
  • 1 1/2 teaspoons pure vanilla extract
  • 1 cup milk chocolate chips
  • fleur de sel to garnish – optional

Directions:

  1. Into a heavy bottom sauce pan melt butter over medium heat. Continue cooking until butter turns brown. Stirring constantly. Remove from heat. Set aside to cool.
  2. Into a large bowl: mix: flour, baking soda, and salt. Set aside.
  3. Into your stand mixer add: butter and sugar. Mix until combined. Add eggs, vanilla and continue mixing.
  4. Gradually add flour mixture and mix until just combined. Fold in chocolate chips.
  5. Transfer dough to refrigerator to set for minimum of 30 minutes.
  6. Preheat the oven to 350 degrees. Using a small cookie scoop, scoop dough balls onto a rimmed baking sheet lined with silicon, parchment or spray with non-stick spray. Leaving space between each for spreading.
  7. Bake for approximately 11 minutes. Allow cookies to cool on pan for a minute and then transfer to a wire rack. Garnish with fleur de sel if desired.

Original Recipe

My First Time . . . With Piping Buttercream Rosettes!

I hope you all had an amazing Mother’s Day! Each and every day should be Mother’s Day considering what they’re always doing for us. This Mother’s Day, I made a layer cake for my amazing mom. I was running a bit (read: very) short on cash this year, so I couldn’t afford to buy her an extravagant gift. So I decided to try my hand at making a cake covered in rosettes.  Image


I did cheat a little, though. I used a dark chocolate cake mix instead of making it from scratch. I had an AP exam coming up, so I didn’t have much time to put together something. However, I did try to spice it up a little by spreading the inside with some delicious nutella.

For the frosting, I just made this basic buttercream and dyed it with a little bit of Americolor’s Teal food gel.

I know this isn’t perfect, but hopefully I’ll improve my “frosting skills” as I practice some more. If you have any experiences with frosting that you’d like to share, feel free to comment below!


Cooking A-Z :: A is for Almond Brittle

I’m starting a Cooking A-Z project on my blog to challenge me and spark up my baking experience. I was inspired by Sweets, Eats, and Crafts to do this, and I highly recommend you checking out her blog! It’s quite amazing. Hopefully my posts will inspire you to start a Cooking A-Z of your own.

Okay, so I have a confession. I actually burned my hand pretty badly while making my first batch. It led to a pretty not-so-delightful blister. Oops. But hey, everybody’s gotta make some mistakes to get where they are.. right? Right……? Sigh. Hopefully someones agrees with me there. Anywho, here’s the recipe. It’s originally a recipe for peanut brittle, but I used up all the peanuts I had when I made my burned batch so I had to substitute for almonds.

By the way, you don’t need a functional oven to make this recipe because this is made in the microwave!

PLEASE, PLEASE be extremely careful when making the brittle. If using a slightly smaller bowl, the mixture will overflow when the baking soda is added and you may burn yourself. 

 IMG_6596Ingredients:

  • 1 + 1/2 cups dry roasted almonds (or whichever nut you prefer)
  • 1 cup white sugar
  • 1/2 cup light corn syrup
  • 1 tbsp butter
  • 1 teaspoon vanilla extract
  • 1 teaspoon baking soda


WYD:

  1. IMG_6592
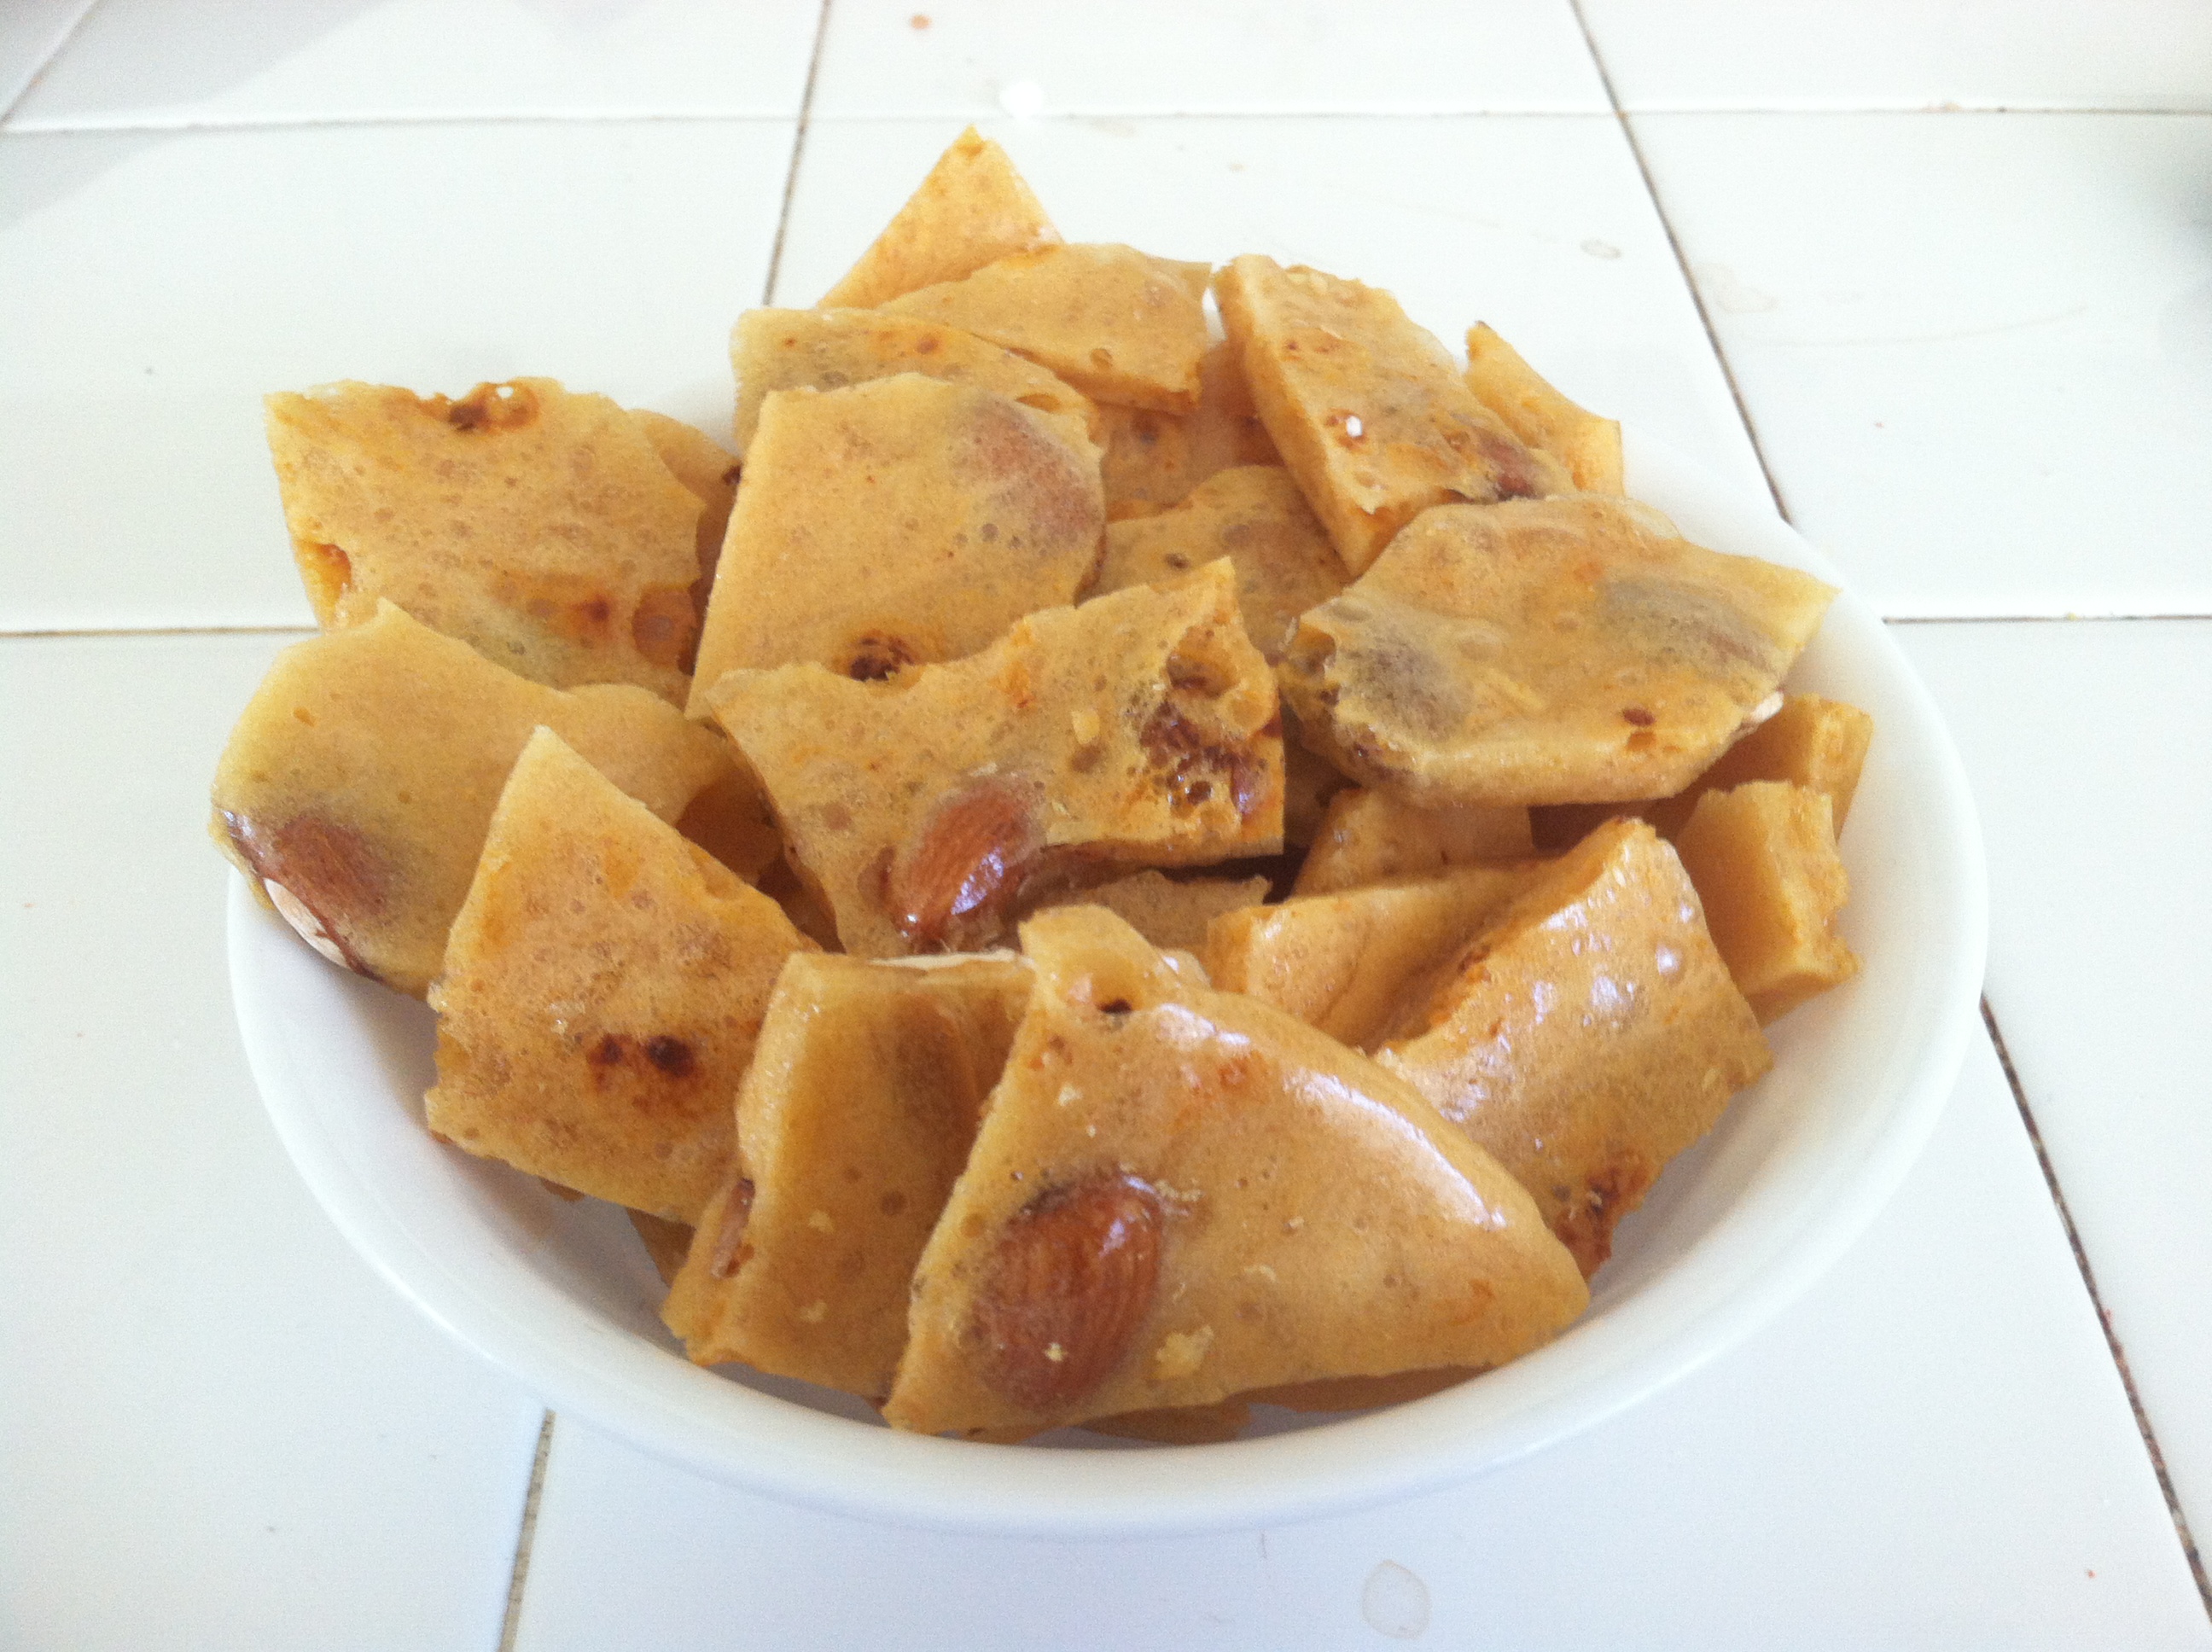
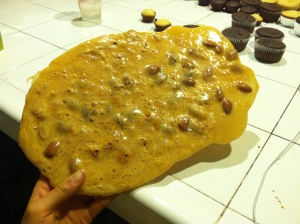
Grease a baking sheet, and set aside. In a glass bowl, combine peanuts, sugar, corn syrup, and salt. Cook in microwave for 6 to 7 minutes on High (700 W); mixture should be bubbly and peanuts browned. Stir in butter and vanilla; cook 2 to 3 minutes longer.
  2. Quickly stir in baking soda, just until mixture is foamy. Pour immediately onto greased baking sheet. Let cool 15 minutes, or until set. Break into pieces, and store in an airtight container.

Yield: well, this much!

Original Recipe

Turtle Pie

Hi there! I’m Yuna and I’m a blogge– wait I already started this blog? Oh yeah, that’s right. I haven’t posted in what seems like forever. I have a lot of recipes to post, but I couldn’t find the time to write and post. A friend’s birthday did pass within these past few weeks! Which means… I baked something quite unique!

I didn’t have many of the ingredients needed for this recipe, so I ended up spending $30 to make this single pie. So for those of you trying to make your friend an inexpensive present, this probably isn’t the first place to look. Unless, that is, of course, you have cool whip, pie crusts, caramel, pecans, and peanut butter lying around your kitchen.

oOooOO look at that caramel-y chocolatey deliciousness.

Ingredients:

  • 1 graham cracker/oreo cookie crust (homemade or store-bought, I used store-bought)
  • 8 ounces cream cheese, softened
  • 1/3 cup sugar
  • 1/3 cup smooth peanut butter or more to taste (I used about 1/4 cup more)
  • 2 cups thawed whipped topping
  • 1/2 – 1 cup chopped pecans, toasted and divided
  • 1/3 cup caramel ice cream topping + more for drizzling on top
  • Melted chocolate for topping

Directions:

  1. Beat together the cream cheese, sugar, and peanut butter.
  2. Toast the pecans for around 3-4 minutes on your stovetop.
  3. Add whipped topping and half of the toasted pecans to the cream cheese mixture and blend well.
  4. Spread some caramel ice cream topping on the graham cracker/oreo cookie crust.
  5. Spread the cream cheese mixture on the crust.
  6. Freeze for 3 hours.
  7. Take out the pie and spread the rest of the pecans over the top.
  8. Melt some chocolate and drizzle it on the entire pie.
  9. Drizzle as much caramel as you’d like.
  10. Freeze again for 1 hour.
  11. Serve and keep frozen when not being eaten!

Hot Chocolate Popcorn

Every girl who has her time of the month come by while going through a stressful period of time has to have some kind of a sweet tooth. I can’t possible be the only one! Well, that’s exactly what happened to me this week. Which is why I had to curb my craving for sweets with a touch (or maybe more) of deliciously sweet chocolate and salty sweet kettle popcorn.

Hot chocolate isn’t just for summer. I take a packet of hot chocolate to school if I want to make myself a cup to get my chocolate fix, or I make myself a quick glass to end my meal with a sweet, chocolatey touch. Another more unique way to get your hot chocolate fix is with hot chocolate popcorn!

I actually didn’t have a recipe for this, I kind of just went on a whim and put together some chocolatey things together and this was the absolutely beautiful dessert.

IMG_0413Ingredients:

All of the ingredients are to taste, you can use as much or as little as you want!

kettle corn or salted popcorn

milk chocolate

white chocolate

hot chocolate powder

parchment paper (optional)

Continue reading

Lucky Charms Cupcakes

Cereal is one of my favorite foods. I can eat it for breakfast, lunch, and dinner…. for a whole day. There are so many different types of cereal, I absolutely love it. You can have super sugary cereal for a snack or a less sugary snack for a more “savory” feel. There’s puffy cereal, crunchy cereal, colored cereal, plain cereal. The list and combinations are endless! And this crazy love for cereal inspired me to go out, buy a box of lucky charms, and whip up a batch of lucky charm cupcakes!

lucky charms

Ingredients:

Cupcake:

  • 1/2 cup whole milk
  • 1 cup  Lucky Charms
  • 1 1/4 cups flour
  • 1 teaspoon baking powder
  • 1/2 tsp baking soda
  • 1/2 tsp salt
  • 2 large eggs
  • 3/4 cup granulated sugar
  • 1 tsp vanilla extract
  • 1/2 cup vegetable oil

Marshmallow Frosting:

  • 2 large egg whites
  • 1/2 cup granulated sugar
  • 1/4 tsp cream of tartar
  • 2 tsp vanilla extract

WYD:

Cupcakes:

  1. Preheat oven to 350°F. Line your cupcake pan.
  2. In a medium bowl, stir the milk and cereal together. Stir occasionally and soak for 20 minutes. Strain out and discard cereal. Set your delicious cereal milk aside.
  3. In a medium bowl, whisk the flour, baking powder, baking soda and salt together.
  4. In a large bowl, beat the eggs, sugar and vanilla extract together. Add half of flour mixture and vegetable oil, and stir until combined. Add remaining flour mixture and cereal milk, and stir until fully combined.
  5. Fill the cupcake tins 3/4 full. Bake for 16-18 minutes.
  6. Let cupcakes cool in cupcake pan for 10 minutes before transferring to a wire rack.
  7. Cool completely before frosting.

Ingredients:

  1. Place egg whites, sugar and cream of tartar in a double boiler over medium-high heat. Constantly whisk mixture, until sugar has dissolved and the whites are foamy and warm to the touch.
  2. Transfer egg whites to a stand mixer with the whisk attachment. Beat egg whites until stiff, glossy peaks form. Add vanilla and mix until combined. Pipe onto cooled cupcakes and serve immediately.

Note: My frosting did not turn out so well, but it did taste good! Let me know how these work out for you!

Original Recipe

Salted Caramel Dark Chocolate Cookies [[Award Winning]]

Hi everybody! Is it just me or is cleaning the absolute worst part of baking. I’m thinking of starting a “Baker Problems” series. I feel like a lot of people would relate to it HAHA.

These cookies are extremely popular amongst my friends and family (and me of course!). I do recommend using rolos instead of regular baking caramels because with the rolos, you not only get a soft, melty (is that an adjective?? hey, I’m more of a baker than a writer!), gooey caramel, but you also get a little bit of melted chocolate inside your cookie. I did make these a bit smaller than the recipe suggests, which means I reduced the baking time by about 2 minutes.

Honestly, these cookies taste absolutely amazing and they’re pretty easy to make! I made these a couple months ago, when I first started baking, and they turned out pretty well! ^___^

Have fun!

ImageIngredients:

  • 1/2 cup (115g) unsalted butter, softened to room temperature
  • 1/2 cup (100g) granulated sugar
  • 1/2 cup (100g) dark brown sugar (light brown is fine)
  • 1 large egg, room temperature preferred
  • 1 teaspoon vanilla extract
  • 1 cup (125g) all-purpose flour
  • 2/3 cup (80g) unsweetened cocoa powder
  • 1 teaspoon baking soda
  • 1/8 teaspoon salt
  • 2 Tablespoons (30ml) milk
  • 1 and 1/2 cups (270g) Dark Chocolate Chips
  • 16-17 Rolos
  • coarse sea salt (I used regular Kirkland sea salt)

WYD (What You Do/What Yuna Did):

1. In a large bowl, cream the butter and add the sugars until light and fluffy. (If using a handheld/stand mixer cream butter for 20 seconds and add sugars both on medium speed)

2. Beat in the egg and vanilla.

3. In a separate medium bowl, sift in the flour, cocoa powder, baking soda, and salt.

4. Slowly add the dry ingredients into the wet ingredients.

5. Chill dough for a minimum of 1-2 hours.

6. Preheat oven to 350ºF

7. Line a large baking sheet with parchment paper or a silicone baking mat.

8. Take 2 tbsp scoops of the dough, split in half, and roll each half into a ball.

9. Stick a rolo into one ball, top with the other ball and seal down the sides.

10. Sprinkle each cookie with sea salt before placing in the oven.

11. Bake for 12-13 minutes. The cookies will appear undone and very soft.

12. Cool on cookie sheet for a minimum of 5 minutes before transferring onto a wire rack.

Yields: 16-18 large cookies.

Original Recipe

Itty-Bitty Teeny-Tiny Chocolate Chip Cookies

Hi everyone! I’m Yuna, and this is my second blog on wordpress, but it is my first cooking/baking blog! I have a food-tasting/review blog titled twofoodiechicas, originally created on weebly. I decided to make the move from weebly to wordpress because I feel like there’s more of a community here, so I’m very excited to meet everyone here!

However, my twofoodiechicas blog has been running quite slowly because I’m the only one who does much eating. As the title may suggest, there are two chicas. But the chica I run my blog with is constantly dieting and doesn’t really eat much to review.

I’ve always wanted to start a baking/cooking blog so when I realized it would be hard to move all of my posts from weebly to wordpress, I seized the opportunity to start a new blog.

So here’s my first post! The original recipe calls them “Mini Chocolate Chip Cookies” but that was too boring for my standards. Therefore, I decided to call them… Itty-Bitty Teeny-Tiny Chocolate Chip Cookies. What a mouthful! Oh well, it adds a little bit of spunk in my day.

Recipe:

1 stick of softened butter
1/2 cup brown sugar
1/4 cup white sugar
1 egg
1 teaspoon vanilla
1/3 cup all-purpose flour
1 cup cake flour
1/4 teaspoon salt
1/2 teaspoon baking soda
1/2 cup mini chocolate chips
Image
WYD (What You Do//What Yuna Did):
1. Mix the butter and sugars together.
2. Add the egg and the vanilla into the mixture and mix until combined.
3. Sift in the flours, salt, and baking soda.
4. Mix until just combined and stir in the chocolate chips.
5. Refrigerate the dough until firm (Roughly 1-2 hours)
6. Preheat oven to 350ºF
7. Scoop 1/2 teaspoon balls onto a baking sheet
8. Bake for 5-8 minutes or until desired doneness.
IMG_0497Bonus Tip: Put a bunch of these into a jar (i.e.mason jar, empty peanut butter (or speculooscookie butter) jar) for a cute gift!
 Yields: 12 dozen cookies